Tag Archives: cheese

Making Cheese…In Your Bathtub?

This weekend I took the plunge. I had been flirting around the edges of homemade dairy products for a while, toying with the idea of making my own cheeses for months. I researched recipes, read about failures and successes, and scoured the blogs for tips and hints to create a delicious cheese at home without any extra equipment or magical chemicals (rennet is a magical chemical that any serious cheese maker is going to have to face sooner or later). Cheese making or dairy alchemy as the dork in me likes to think of it is easier than you would believe.

The recipes and tutorials on-line were lacking for me. Not that they weren’t full of great tips, detailed pictures, or solid recipes, but the majority of the ones I read through required a thermometer and a microwave which are two things that I do not have. I ended up buying a thermometer, but I find microwaves abhorrent and have no plans of owning one unless it is for the pure, unadulterated joy of making grapes turn into floating, nuclear orbs. Instead I consulted my cooking bible: Mark Bittman’s How to Cook Everything: Vegetarian (the original How to Cook Everything also has a recipe for making fresh cheese, but I used the vegetarian edition this time. I am not sure if the recipes differ at all.) His recipe calls for neither a thermometer or microwave.

My cheese making journey continued from the recipe to Whole Foods market in Cupertino. The parking lot at the Whole Foods in Cupertino is almost as bad as the parking lot at Ranch 99 quite similar to a UFC cage fight but with caffeine fueled raging yuppies in Priuses instead of steroid enhanced bulging biceps and sweaty oiled up men wrapping their crotch around another man’s head. I actually found a parking spot quite easily because I don’t care how close to the store I park. Once inside the store I was disappointed that they do not have raw milk and I settled for Strauss Creamery Whole Milk. How many pretentious points do I win for that sentence? In addition to the half gallon of milk, the recipe requires a quart of buttermilk. I used low-fat cultured buttermilk because I didn’t have a choice. It was this or goat buttermilk. I didn’t want mix the teat juice of two different animals together. That didn’t seem kosher to me (it probably is kosher, but I’m not an expert on the exact laws of kosher).

I gathered the rest of my groceries, was assaulted by an exuberant chick in the frozen food aisle (apparently there is a brand of frozen yogurt at Whole Foods that is “the absolute shit”), and insulted by the checker. I don’t know but Andrew and I have managed to be magnets for the yuppie wrath of the Whole Foods checkers. First it was the snooty middle aged woman with the bad bleach job insulting our reusable Target bag and this time around it was a checker snidely commenting to the bagger, “How do you feel about wasting paper?” because I had more items than what could fit in my reusable bag. Obnoxious shaved head, peace sign, gaged ear mother fucker. Needed to get that off my chest.

A very important picture showing the ingredients. Showing off my pretentious dairy.

The first step after buying your products and braving the snobbery of up-scale grocery stores THAT DON’T EVEN SELL RAW MILK, is to bring your milk to a boil. Well, my first step was to actually clean out the rice underneath my burner that was sure to set my smoke alarm off (our smoke alarm is a bit trigger happy and I bet it would be get an erection from a birthday cake) and clean out a large, stainless steal pot. You need a big pot for this. If you have one of those fancy enamel pots go for that. It just needs to have a heavy bottom and I think aluminum does something scary so don’t use that.

1. Bring your half gallon of milk to a boil on medium-high heat, stir to keep it from scalding (aka that nasty burnt milk smell)

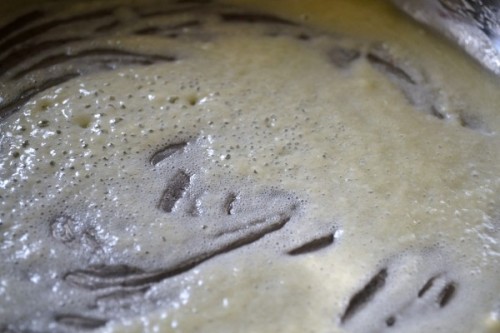
Once your milk comes to a boil with bubbles coming up the sides, then you are ready to add your quart of buttermilk. Stir it until the whey and curds start to separate. In other words stir until it looks like a yeast infected vagina has discharged into a giant tub of urine. That is seriously what it looks like. It is not appetizing looking at this point. It was a matter of about a minute for this to happen so you need to have your colander prepared.

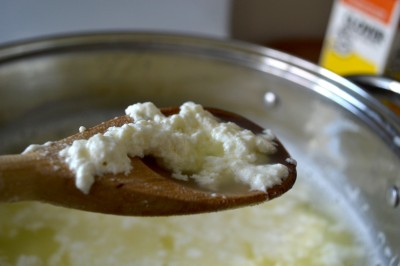
The curds separating from the whey. Curds are the chunky part and whey is the liquid. Whey can be added when cooking bread to add extra protein. 

This is not delicious looking at this point. 

Once the curds and whey have separated remove your pot from the heat. Add salt. Be liberal with the salt. I was not liberal with the salt and my cheese I think lacked for it (that’s a nice way of saying it ended up bland). At this point you should have prepared your draining situation. Your draining situation should consist of a colander and three layers of cheese cloth. You can get fancy with additional accoutrement such as a dowel and some twine, but I prefer to keep it simple. Make sure you have enough cheese cloth to cover your cheese completely and be able to knot it.

The curds as the whey drains away.

Carefully pour the mixture over the cheese cloth. Make sure you are doing this over the sink or a bowl if you want to save your whey. Tie your cheese cloth in a knot so none of the curds are going to escape. Now tie it to a place where you want it to drain. I started with mine draining over the kitchen sink but then realized that I had dishes to wash so I moved it to the bathtub. And I thought the only thing you could make in your bathtub was moonshine. Let it drain wherever you set it up for about an hour to an hour and a half then refrigerate.

My kitchen sink draining situation. 

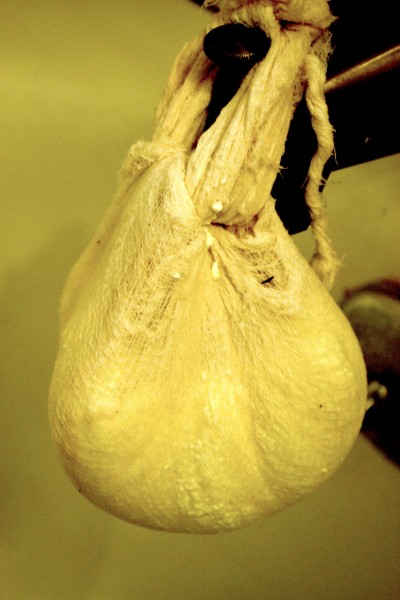
My bathtub cheese draining situation. 

Homemade fresh cheese! Yum!

Thinking Outside the Box: Creative Ways to Enhance Store Bought Macaroni and Cheese

I go through food phases. The last month I have hardly cooked anything, be it from scratch, from a can, from the freezer or from the box. Most of my meals have consisted of Subway sandwiches or a combination of bananas and beef jerky bought from my morning pre-work 7-11 foray. I have had time to cook since classes ended in May, but I just haven’t felt the desire, the passion for homemade food lately. In the past week things have gotten better and I found myself “cooking” a little more at home. This cooking consisted mainly of boxed macaroni and cheese with added ingredients to make it more interesting, flavorful, and healthy. There was also one ramen dabbling that did not end well.

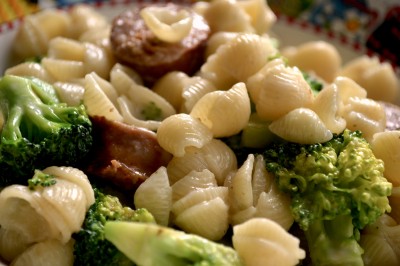
Annie’s Shells with White Cheddar, broccoli, and hot Italian sausage

First of all, I think it is important to start with a better brand of macaroni and cheese. I know Kraft Mac ‘N Cheese brings back memories of childhood with its nuclear orange powder and almost tinny taste, but there are better, healthier brands of boxed macaroni and cheese out there. The brands I use nowadays are Annie’s and Safeway Organic (I think Safeway Organic has more flavor than Annie’s to be honest and it’s much cheaper).

10 Ways to Enhance Store Bought Macaroni and Cheese

1. Add green vegetables. These not only makes it taste better, but fresher and healthier. I generally add broccoli or asparagus because they are not only some of my favorite vegetables but they cook quickly and can be tossed in with the pasta while it’s cooking or even after it’s done. What I generally do is put the cut up broccoli pieces in the colander then pour the pasta with water over it. The broccoli comes out crunchy, but slightly cooked. Frozen peas would also be a nice addition, but this is something you can experiment with.

2. Add cooked sausage or hot dogs. Slice these up and add in after you’ve mixed the pasta with the cheese powder or sauce. I generally make mine with hot Italian sausage.

3. Add tabasco, tapatio, or any hot sauce for a spicy, cheesy dinner.

4. Shred cheddar, jack, colby, or pepper jack for more cheese in your Macaroni and Cheese. I think this is especially nice with Annie’s brand because I found it distinctly lacking in cheese flavor.

5. Grill up some onions or shallots while your water is boiling for a more robust flavor and a different texture. I think this would go great with some sliced kielbasa in there as well or a bratwurst.

6. Add roasted bell peppers or hot peppers for a smoky, spicy flavor. Either use jarred or make your own fresh in the oven or on the grill.

7. Cut up luncheon meat such as ham, salami, roast beef, or turkey and toss it in. I think ham would complement the flavor best.

8. Make a macaroni and cheese grilled cheese sandwich. This definitely is overkill on the cheese factor but think of the different textures. Butter up some of your favorite bread, add a slice of your favorite cheese to each piece of bread and add your prepared macaroni and cheese. Press sandwich together and go forth as you would with a grilled cheese sandwich.

9. Add crumbled bacon, canadian bacon, or get fancy with pancetta. This will add a smokey flavor along with some crunch.

10. My friend Ian introduced me to this last one. It is definitely an acquired taste and not for everyone. Add sliced up hot dogs and brown sugar to the prepared macaroni and cheese. This creates a salty/sweet and smokey flavor that some people might have a hard time wrapping their taste buds around, but I found it delicious.

Offensive Dairy Post

I wanted to call this post Macaroni and Cheese or Rigatoni and Cheese, but I’ve read somewhere that blog entries will get more readers if their entries have more interesting titles. Macaroni and Cheese would also be false advertisement because this is not macaroni and cheese, it is rigatoni and cheese.

I titled it offensive dairy post because  Andrew, my boyfriend, finds dairy offensive.  He was grossed out by the smell of butter melting on the stove top yesterday and the strong smell of some delicious, strong cheeses. He said there was so much offensive dairy going into my lunch that he might have to take a walk. He was just joking about the last part, but the guy has some serious issues with dairy.

I hardly ever cook with dairy because of his aversion, but yesterday I was really craving pasta with cheese sauce, not necessarily macaroni and cheese, but some sort of pasta with cheese. I always hesitate to call something macaroni and cheese because mac and cheese conjures up images of neon orange powder mixed with little dried macaroni that we used to make into necklaces in pre-school. I loved that stuff.

The first step for making a cheese sauce is to make a roux. A roux is a mixture of melted butter and flour cooked on the stove top.

Melt about a tablespoon of butter

Add flour and cook on the stove top.

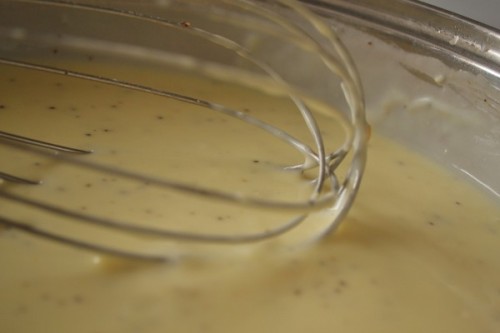
Add milk, whisk and cook until thickened. Add whatever spices you like. I used black pepper and salt.

Add sauce to cooked rigatoni. Enjoy!


Chicken Breast with Pepper Jack

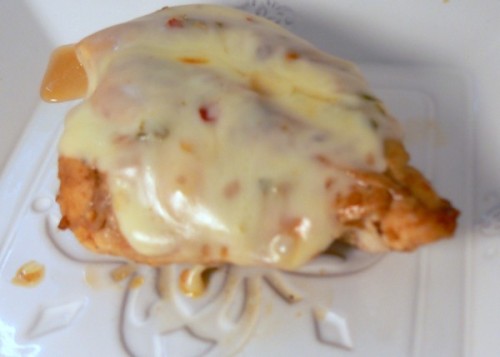
I got out of the trenches early today and made a nice lunch at home of chicken breast with pepper jack and pineapple. It’s definitely simple, but it was super easy and pretty tasty. The photo is out of focus though.

Chicken breast cooked on stove top seasoned with dried garlic, salt, and cayenne. Half a slice of pepper jack cheese on top melted.

Two Egg Omelette

This morning after my walk I decided I wanted to make an omelette for breakfast. I had in my mind that I would make a duck egg omelette. I don’t know why, but I wanted to try duck eggs. I drove over to Whole Foods because I believed they sold individual eggs including duck eggs. Disappointingly they do not sell individual eggs anymore and they do not sell duck eggs. I bought organic eggs instead. I also organic loose leaf spinach, a snack sized piece of kerrygold cheddar, and an avocado.

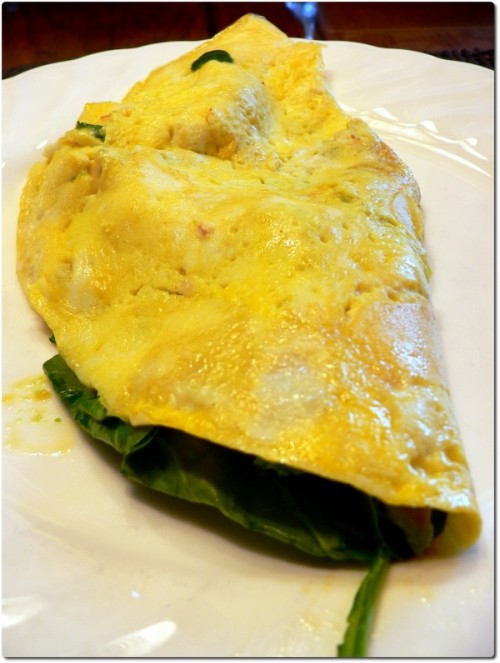
I have tried to make omelettes before and have always failed, ending up with scrambled eggs and toppings. This time I used a non-stick skillet, plenty of margarine, low-temperature, and patience. I came out with a pretty nice looking and delicious tasting omelette.

Two Egg Omelette

  • two eggs
  • 1 tbsp. margarine
  • 1/2 avocado
  • 1 oz. kerrygold dubliner cheddar
  • 3/4 cup spinach

1. Heat non-stick skillet with margarine on medium low heat. Whisk eggs until frothy. Add eggs to the skillet once margarine is melted and make sure the eggs are evenly spread on the surface of the pan.

2. While the eggs are cooking, cut the avocado, shred the cheese, and tear up spinach into smaller pieces.

3. It will take about five to seven minutes for the omelette to cook. Once the eggs are set, add filling on one side. Add cheese first, then avocado, and then spinach. This will ensure that the cheese melts. To fold the omelette, gently work the spatula underneath the non-filling side of the eggs, lift up carefully, and fold over the filling side. Slide the omelette off the skillet onto the plate.

Tacos…or something with tortillas

One thing we eat a lot of around here in California is “Mexican” food. “Mexican” is a blanket term for anything involving tortillas, rice, beans, and avocados. This can be in the form of burritos, tacos, papusas, empanadas, enchiladas, or quesadillas. I’m not sure what can be classified as authentic around here. Then there is also the clash between the NorCal and SoCal burritos. I’m a NorCal burrito person myself because I’m not into the refried beans that are used in the SoCal burrito. Plus, NorCal burritos are monster sized and super cheap. They can last me two meals.

Last week we bought a large package of flour tortillas from Safeway and did a taco night. Taco night around our house pretty much consists of pinto beans, avocados, flour tortillas, chile verde, and cheese (for me). This time I made brown rice to go with it and Andrew sauteed some diced yellow onion. This was the first time that I succesfully made brown rice. It was great! This is a simple, easy meal. I wouldn’t say it’s quick because brown rice takes almost an hour to cook, but it definitely is easy.

Basic Brown Rice

  • 1 cup brown rice
  • 2 cups vegetable broth

1. Put brown rice and vegetable broth in a small saucepan. Then bring heat to high and boil.

2. Once the rice and broth are boiling, turn the heat to low and cover with a lid. Let it simmer for forty-five to fifty-five minutes.

3. Remove the lid and fluff the rice. I had excess liquid even though my rice was done cooking. I just drained this out into the sink.

Here is what it looks like as you’re cooking:

1. The rice and broth boiling. The red rings are what heat my food (I miss gas burners).

Yes, our stove-top is almost always that clean.

This is the rice simmering. Seriously, this is thrilling stuff. Do the rest of your cooking while the rice is cooking away or be like me and read a history book (I recommend Alison Weir)

And here is the finished product. No, yours will not be this glowing. That is just my lovely over the top flash because I do not have my portable desk lamp at this house yet.

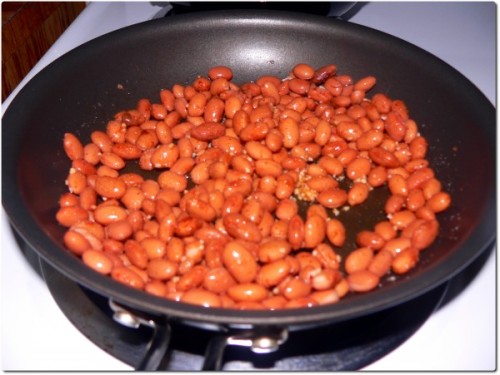
We ate this with canned pinto cooked with onion powder, chili powder, and minced garlic. We always buy the organic, low-sodium kind and then rinse them before cooking.

And this is the final product. It is a terrible picture but I couldn’t focus with that little of light.

Israeli Couscous “Risotto”

I was reading through cookbooks last weekend and came across something that I had never heard of before: cooking pasta like risotto. Now, reading this terrified and excited me. I could foresee pasta burning and sticking to the pan, coming up undercooked and gummy at the same time. I was also excited by the possibility of saving water and the time it takes to boil the water. This has been in the back of my mind the past couple days.

I was driving home from class today over hwy 17 and got really hungry. I’ve been getting very hungry all of a sudden lately. I was daydreaming of burritos, chinese food, and all sorts of take-out. Then I thought of my bank account, the feta cheese, roasted garlic, dried cranberries, salad greens, and array of carboyhydrate options I keep in my cupboard. I knew I could come up with something delicious, easy, satisfying, and quick.

I figured that Israeli couscous would be the perfect sized pasta to try out risotto style. I like making risotto and have never found it to be a challenge. I’ve always found cooking a pot of rice to be more of a challenge. I also like Israeli couscous. I like it much better than those tiny wimpy regular couscous.

Out came the Israeli Couscous “Risotto”. Creamy, tangy, savory, sweet. Nutty, hearty, and simple. A great lunch for when you have time to cook. Or it could be a great dinner. A wonderful way to use leftovers and experiment.

Israeli Couscous “Risotto” with Dried Cranberries, Feta, and Roasted Garlic

  • 1 1/3 cup Israeli couscous
  • 1 3/4 cup water (you could also use stock or a combination of stock and water)
  • salt, pepper, and chili pepper flakes (my holy trinity of spices)
  • 1 tbsp. olive oil
  • a handful of dried cranberries
  • a couple cloves of roasted garlic
  • a handful of herb and garlic feta
  • a handful of salad greens

1. To toast your couscous add the olive oil and couscous to the pan and heat to medium. I use a heavy bottomed aluminum pan because I have some sort of disease that prevents me from ever wanting to use non-stick. Add salt, pepper, and chili pepper flakes.  Heat for about five minutes until they little balls turn a golden color and they smell nutty (or in my case almost burning).

2. Gradually add your water and stir. You want to add the water in small increments. The way I gauged it was add a little water, stir, stir, stir, and then when the little balls started to stick I added more water before they could adhere themselves permanently to the pan. This process took about fifteen minutes.

3. Add roasted garlic cloves and smash them up into the couscous. Let them heat through for about a minute or so. Then remove the pan from the heat. Add cranberries and feta.

4. In a bowl mix together couscous mixture and salad greens. Enjoy.

Recipe Reviews: The Veganomicon

I’ve been slowly working my way through some of the recipes in the Veganomicon that interest me. I think they have a lot of great recipes. It is an informative book and the descriptions before each recipe are cute and humorous. My main issue with the recipes are the fact that they do not take into account the time that prep work takes. My carrots, peppers, onions, garlic do not always come magically sliced, minced or chopped. Since I am not a professional cook and have very limited machinery, slicing onions take forever and I’m very sensitive to the sulphur (which means that I cry like a little girl whose just lost their favorite doll). I’ve been mostly satisfied with the recipes in the book, but they are time consuming. Very time consuming.

This last weekend I decided to throw a BBQ to celebrate being accepted into my credential program at San Jose State. I wanted to make one vegetarian dish and Andrew was going to bbq some meat. I ate red meat for the first time in a couple months, but more on that later. I decided to make the Manzana Chili Verde and Skillet Corn Bread. I adapted the corn bread to be made in a piece of bakeware and with spelt flour. I’ve been trying to reduce the amount of white flour that I use.

I’m not going to write the recipe for the Manzana Chili Verde since it’s incredibly long, but I will note that the recipe says 1 hour to make. This is ridiculously underestimated. You would have to be Speedy Gonzalez or Flash Gordon to make this recipe in an hour. It took me at least an hour and a half, probably closer to two hours. The prep work took me forever since I’m a slow cutter. The recipe does not include the prep time for cutting all the vegetables. Also, I had to extra beans to make this hearty enough to be a chili. We ended up using it more like a dip than eating it out of a bowl. It was very tasty, but I don’t think I would make it again.

I will give the recipe for the cornbread since I made some adaptions. I really enjoy the way it came out. It has a heavy corn taste and a very dense moist texture from the spelt flour. The only critique I have of the recipe is that it also took much longer than it said in the book. The book says that it needs to cook for 30-32 minutes. Mine nearly took forty-five minutes. I find that this is a trend in this book. Either my oven is screwed up or the authors of this book have a super oven.

Skillet Corn Bread (Basic Corn Bread)

  • 2 cups unsweetened almond milk (recipe uses soy)
  • 2 teaspoons apple cider vinegar
  • 2 cups cornmeal
  • 1 cup spelt flour (original recipe uses all-purpose flour)
  • 1/4 cup sugar
  • 2 teaspoons baking powder
  • 1/2 teaspoon salt
  • 1/3 cup oil

1. Preheat the oven 350 degrees F. Lightly grease a square baking pan with spray oil or whichever type of grease you like.

2. Combing the milk and vinegar in a measuring cup and set aside to curdle as you prepare everything else. In a large mixing bowl, mix together the cornmeal, flour, sugar, baking powder, and salt. Create a well in the center and add the milk mixture adn oil. Use a spoon to mix together until just combined; some small lumps are okay, but try to get rid of large lumps.

3. Pour the batter into the prepared baking dish. Bake for 30-32 minutes. Now, mine took much longer than this. Keep checking with a sharp knife or toothpick to see if ti comes out clean. Remove from the oven and let cool a bit before serving.

Today I some of my leftover cornbread with a third of a can of black beans, some mozzarella cheese, and tapatio sauce. It made for a tasty, delicious lunch.

Creamy Italian Sandwich

The first couple bites of this sandwich were absolutely amazing and then as I started eating more if it I started feeling overwhelmed by the richness of it. The idea was a good one, but I think to get to a perfect finished product it definitely needs some tweaking.

Yesterday our class had an end of the year party. Most of the parents brought the typical ham and cheese/turkey and cheese sandwiches, but one mother (who is a champion against school lunches and an amazing artist) brought quesadillas. These quesadillas were bomb (yes, I grew up in the mid-nineties). They were whole wheat tortillas with ricotta, mozzarella, and spinach. I ate two of them. I wanted to go back for more.

I was thinking about the different kinds of things that I could do to quesadillas and sanwiches. I was thinking hmm…I have pizza sauce in the freezer, I have olives, I want greens on it: a pizza salad sandwich. I want something creamy, but ricotta can be expensive…cream cheese!

Here it is folks, The Creamy Italian Sandwich.

Ingredients

  • One Francese Roll (you could use whatever kind of roll you like)
  • 2 tbsp. marinara/pizza sauce (I had some in the freezer, you could use jarred or your homemade kind)
  • 2 tbsp. Tofutti Better Than Cream Cheese
  • 1 tsp. pesto sauce
  • black pepper to taste
  • 1/4 cup shredded mozzarrella cheese
  • 1 cup or more of mixed salad greens (you could also use spinach)
  • 4 pitted kalamata olives

1. Gut your bread. This means tear out all the soft insides of the bread leaving mostly crust behind. This is to your sandwich isn’t too bready. I know, this may make you sad. I love bread too, but there is a lot of other stuff going on in this sandwich to make up for it.

2. Put cream cheese in a bowl. Add pesto, sliced olives, and black pepper. Mix with a fork until well combined. Now, after eating the sandwich I think two tablespoons of cream cheese was overkill and the pesto unecessary.  Next time I would reduce it to one tablespoon of cream cheese or go with ricotta.

3. Spray olive oil into pan. Spread one tablespoon of marinara/pizza sauce on bread. Spread half of cream cheese/olive mixture on bread. Place in pan. Sprinkle half of cheese on top. Add all your greens. Spread marinara sauce and cream cheese mixture on the other slice of bread. Sprinkle cheese on top of the greens. Add the other slice of bread. Squish down.

4. Put pan on burner and heat to medium. Place a cast iron skillet on top of the sandwich and press down. I suppose you could do this in a panini press or even a waffle iron, if you’ve got fancy stuff like that. I have a cast iron skillet so that’s what I used. Check every couple minutes to make sure the sandwich isn’t burning. Use this time to clean up. Once you smell toastiness, remove the cast iron skillet and check the bottom of your sandwich. If it’s golden flip it and then replace the skillet for another minute or two until the other side of golden. Then dig in and enjoy.

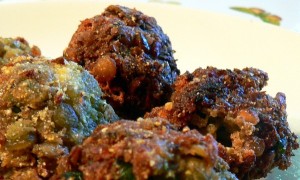
Crispy Lentil Balls

Okay almost everything deep fried is delicious. There are a few exceptions to this rule: snickers, oreos, twinkies, cheesecake. But most things deep fried are delicious and this includes vegan food. There are many negatives to deep frying: it can take a long time, its awful for your body, and its messy. I hardly ever deep fry anything because of this. Things that are typically deep fried I prefer to pan fry or bake in the oven. I think its okay to have every once in a while to have as a treat.

Crispy Lentil Balls

Adapted from the Essential Vegetarian Cookbook

  • 1 cup green lentils
  • 2 tbsp. minced garlic
  • 1 tsp. ground cumin
  • 1 cup fresh breadcrumbs
  • 4 slices pepper jack rice cheese
  • 1 cup mixed baby greens
  • 1 cup polenta

1. Place the lentils in a medium pan and cover with water. Bring to the boil, reduce heat to low; cover and simmer for ten minutes or until the lentils are tender. Drain and rinse well under cold water.

2. Combine half the lentils in a food processor with garlic and mixed baby greens. Process for ten seconds or until the mixture is pulpy. Transfer for a large bowl and add the remaining lentils, cumin, breadcrumbs, and cheese.

3. Using your hands, roll level tabslepooons mof mixture into balls and toss lightly in polenta.

4. Heat the oil in a heavy based pan. Gently lower small batches of the balls into moderately hot oil. Cook for one minutes or until golden brown and crisp. Carefully remove from the oil with tongs or a slotted spoon and rain on paper towels. Repeat the process with the remaining balls.

They turned out crispy and delicious, but I couldn’t too many of them. I loved the mixture of the pureed of lentils with whole lentils.